


How to Shoot a Traditional Bow and Arrow
August 18, 2017
For thousands of years, humans have used the bow and arrow for hunting and warfare. Today, you can buy bows equipped with devices and sights to help you aim accurately and hit a bull’s-eye almost every time they’re drawn. For example, with a fixed pin sight, an archer has a guide that shows how to adjust his aim to ensure he hits the target no matter the distance.
But ancient archers had to learn how to aim without sights. This skill — called instinctive shooting — requires years of trial and error to master. Through consistent practice, the body and mind intuitively learn how to adjust the aim of the bow to accommodate different shooting distances. Instinctive shooting is a lot like throwing a baseball or shooting a basketball. Once you’ve practiced these skills, you don’t really think about aiming when you throw a baseball to someone or shoot a basket. You just do it. Somehow your mind and body are able to calculate the right angle and force to throw the ball to ensure it hits your target, or at least gets very close.
Because of the mind-body connection inherent to traditional archery, ancient archers — particularly those from China — often used the bow as a philosophical metaphor. For example, Confucius was an archery teacher and used the practice as an analogy for wu-wei, or effortless action. To successfully shoot a bow and arrow intuitively, you’ve got to try not to try, because the moment you start trying too hard to aim, you end up missing the target completely. So it goes in life as well.
The funny thing about instinctive bow shooting and this whole idea of trying not to try is that to get to that state, you’ve got to be intensely mindful and deliberate about it. You’ve got to try to try, before you can try not to try.
If instinctive archery sounds like something you could get into, but the last time you shot a bow and arrow was at summer camp as a kid, today we break down the steps of instinctively shooting a bow and arrow. With time and practice, your archery will hopefully hit a state of wu-wei, or effortless action.
How to Instinctively Shoot a Bow and Arrow
While it is possible to instinctively shoot a compound bow, the practice is most associated with traditional archery — that is, archery that uses recurve bows or longbows. For the purposes of this article, we’ll be showing how to instinctively shoot with a traditional bow.
Assume a Relaxed Stance
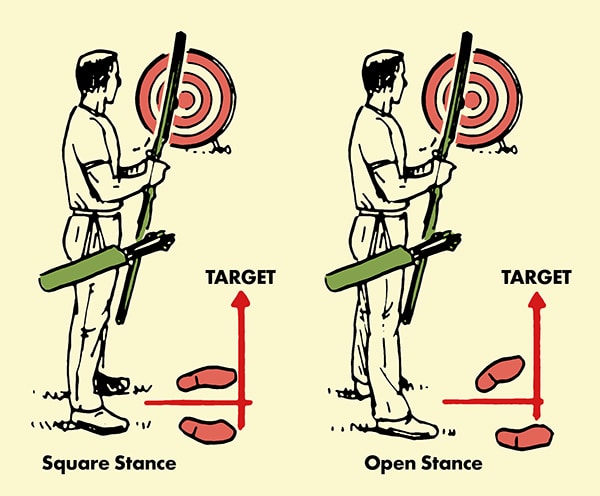
Stand with your shoulders perpendicular to your target with your feet shoulder-width apart. From here, you’ve got two options on how to place your feet. If you’re just starting out, a squared stance — in which both your feet are parallel to the shooting line — is the way to go, as it will ensure that you consistently set up in the same way.
After some practice, you might consider experimenting with an open/oblique stance. With an open stance, the lead foot points towards the target. This stance is good if you’re on uneven ground, and it helps prevent you from overdrawing your bow. The downside is that because it rotates your hips towards the target, when you do draw back, you have a tendency to just use your arms instead of your back muscles.
If you’re a rank beginner, go with the squared stance.
Nock the Arrow
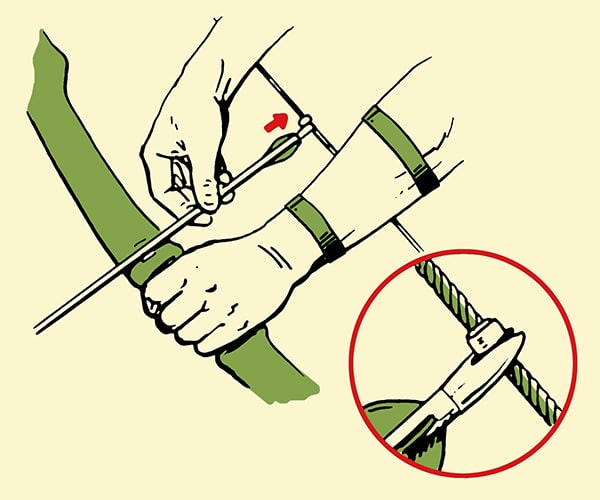
Place the arrow shaft on the arrow rest of your bow. Attach the arrow’s nock — the plastic, grooved part at the arrow’s end — to the bow string. Your bow string should have 1-2 nock locators that indicate where the arrow should be placed, and ensure that you consistently nock your arrow at the same place each time you shoot. If your string has just one locator, nock your arrow just beneath the bead. If it has two locators, nock the arrow between the two beads.
Grip the Bow Correctly
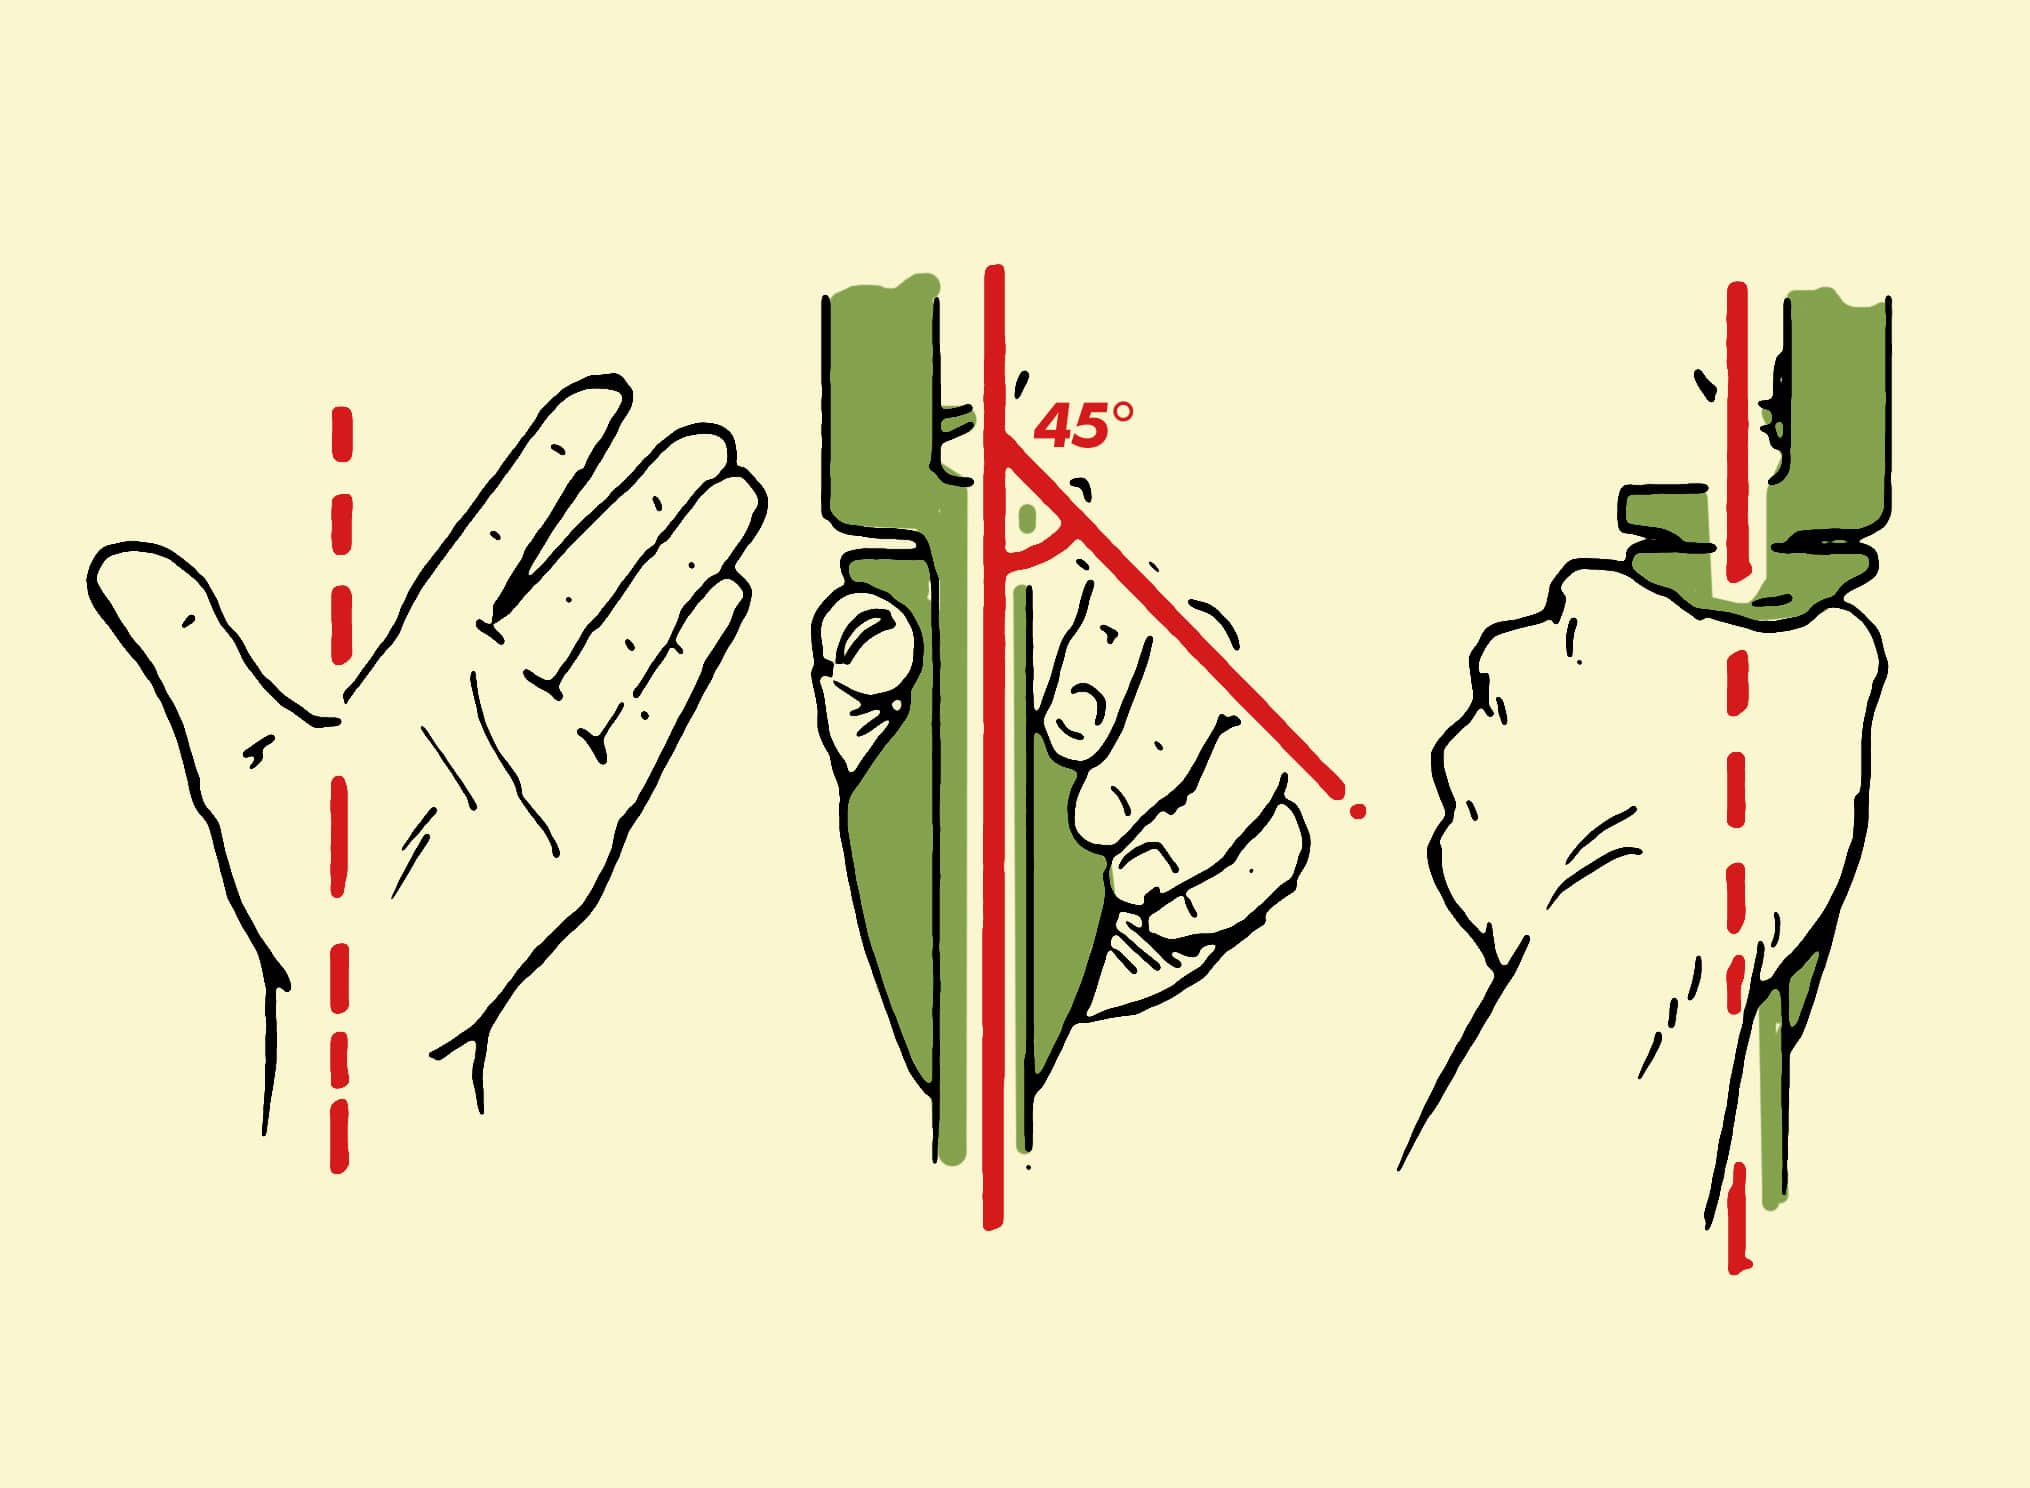
Place the bow in your non-dominant hand. You want the grip of the bow to rest right on the pad of your thumb. This placement will ensure that you don’t squeeze the bow too tightly, which would cause it to torque inwards, throwing off accuracy, and would also place your forearm in-line with the string; if you’re not wearing an armguard, it’s going to hurt when you release it.
A good cue to know if your grip is right is to check to see if your knuckles create a 45-degree angle to the bow grip. If your hand is in that position, you likely have the bow placed on the pad of your thumb.
Squeeze the grip like you’re shaking a hand. Not too hard and not too lightly.
How to Grip the Bow String
With your arrow nocked, and your bow hand gripping the bow correctly, we’re ready to grip the bowstring.
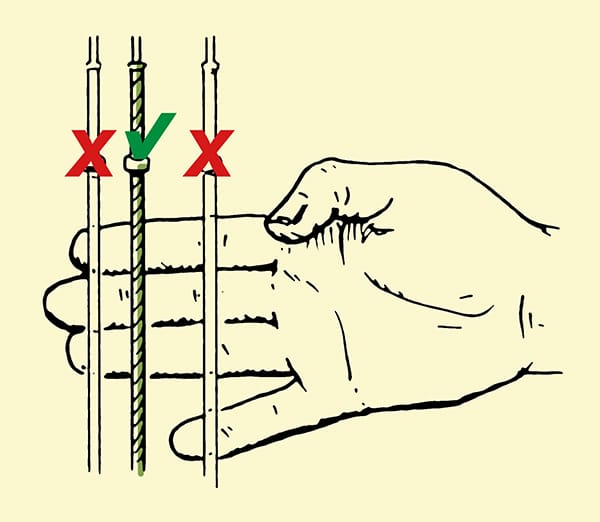
There are different ways to grip a bowstring but for the purposes of this article, we’ll be highlighting the Mediterranean method, as it’s the easiest way for beginners.
With the Mediterranean grip, we’ll be using three fingers — index, middle, and ring — to pull the bowstring back. The bowstring should rest in the groove of your top knuckles. The arrow’s nock should be between your index and middle finger. If that’s uncomfortable for you at first, feel free to put all three fingers beneath the arrow’s shaft.
![]()
If you’re just starting out, pulling a bowstring back with your bare fingers can be uncomfortable and even painful. Consider using a finger tab, which is a piece of leather that protects your fingers from the bowstring. You can also wear gloves if you want.
Copyright © 2017 The Art of Manliness
 CNN Calls Anyone Who Disagrees With Them